The Successware Campaign Management tools allows you to track advertising and its associated expense to show you an accurate Return on Investment (ROI).
This ROI tracking is based upon tracking all jobs which were the result of Lead Sources identified as part of a campaign, and comparing the revenue, or in the case of Estimate Jobs, booked sales to the expenses you have identified as part of the campaign.
All Campaigns will allow you to identify goals related the campaign, allowing you to compare the campaign estimate against the actual results.
Campaigns can be built that focus on two different types of job in Successware:
- Revenue Jobs- These are jobs that are expected to drive revenue directly. Examples would be a campaign advertising Duct Cleanings, electrical or plumbing inspections or other service. These campaigns will look at Revenue generation based upon the total of posted invoices against those jobs. It will also track the number of jobs created.
- Estimate Jobs- These are jobs that will have your salespeople or technicians providing a quote for some sort of service to the customer. These are run as Sales Jobs in Successware. Campaigns intended to drive estimates allow you to track the closing ratio of those sales jobs, as well as the dollar amount of sales generated. Estimate Campaigns will gather their information from the information you enter in the Sales Summary form for Closed sales jobs. There you will identify if the job sold or not, what the quoted amount was and what the sold amount, if any was.
Other Benefits to a Campaign
At times a Campaign that is intended to generate revenue jobs may generate some estimate jobs and vice versa. When reporting on either type of Campaign there is an area of the report that will show you “Other Benefits”. This area will show you jobs of the other type that resulted from the campaign. These “Other Benefits” will not be included in the calculation of ROI, but they will be plainly visible on the report as you evaluate the effectiveness of the Campaign.
Requirements
Lead Sources
Before you build a campaign, you will need to create Lead Sources that represent the different ways that your customers will be exposed to your campaign and thus reach out to you. When creating a job in Successware you are required to select a Lead Source that answers the question where the customer heard about you or where they found your number today.
When building campaigns, you will want to create Lead Sources that are specific to the campaign, such as ads on a specific radio station or billboards identifying a special offer.
There is no need for you to create new lead sources if you run certain types of campaigns over again at a later time. You can deactivate lead sources. This makes them unavailable for a user to select. When re-running the campaign that uses those lead sources you can re-active the Lead Sources. Since Campaigns have a set date range, the reporting will only look at use of those lead sources during the course of that specific campaign.
PriceBook Items
In order to properly track the expenses related to your Campaign you will need to create items in PriceBook to represent those specific expenses. The Campaign Management tool will allow you to identify the expense items related to the campaign and look at occurrences of those PriceBook items that appear on posted AP Invoice during the expense date range of the campaign. In order to assure that the correct expenses are associated with the campaign, it is important that you use detailed PriceBook items to represent the expense as opposed to using “generic” items.
On a Purchase Order or AP Invoice that contains line items that are associated with a campaign, you will be prompted to associate the item with the name of the campaign.
Campaign Management
You can access the Campaign Manager to create new campaigns or to review or edit an existing campaign.
The Campaign Manager can be found in the Main Menu under Marketing.
When you select Campaign Management you will be taken to the “Select Campaign” screen where you will see a list of all active campaigns.
- To review the activity associated with an active campaign, edit the campaign, copy the campaign or report on the campaign double click on it.
- To create a new campaign, click the New button at the bottom of the screen.
Creating a New Campaign
1. From the Select A Campaign screen click the New button.
2. In the New Campaign Form, enter a detailed name and description for the campaign.
3. Select whether the campaign is intended to primarily generate estimate (sales) jobs or revenue (service, maintenance, etc) jobs.
4. Next you will identify the date range for which you want to track jobs created in response to the campaign. Enter the start and end dates in the START and END DATE fields.
This will allow the CAMPAIGN MANAGER to look for jobs created in the date range identified that have a lead source that matches one of those you identify for the campaign.
5. To select the Lead Sources you wish to associate with the campaign, click the Edit button below the LEAD SOURCES area.
6. Checkmark the Lead Sources you want to associate with the campaign.
- You can use the LEAD SOURCE TYPE dropdown to limit the results displayed as well as the Search field to find lead sources.
- The “Selected Items Only” checkbox will allow you to see a list of all the items you have selected so far.
Note: A Lead Source can only be part of one campaign within a date range. If the Lead Source is already associated with a campaign that overlaps the date range of the campaign you are creating, that Lead Source will display in the list in italics and will not be selectable.
7. Click Ok when you are finished.
8. Next, enter the Start and End Date for the expenses related to the campaign in the Expense START and END DATE fields.
Next, you will identify the Expense Items you want to associate with the Campaign. As you add items to POs and AP Invoices, if the item is associated with a campaign you will be prompted to associate the expense with the campaign.
9. To identify the line items that should be included in the campaign, click the Edit button at the bottom of the EXPENSE ITEMS area.
By default, all line items in the Miscellaneous and Overhead sections of your PriceBook are listed.
To limit the results, you can use the Category and Group dropdowns. You can also type a search in the field above the grid to search the description field of the listed PriceBook items.
10. Checkmark the items you want to include as expense items in the Campaign.
The “Selected Items Only” checkbox will allow you to see a list of all the items you have selected so far.
11. Click OK when you are done.
12. Enter your goals for the campaign
- For an Estimate Generating Campaign
- Under Goal: Estimate Jobs- Enter the number of Estimate Jobs you expect to generate, the expected revenue those estimate jobs will generate and the closing rate you are expecting your team to achieve.
- Under Goal: Expense- enter the total of the expenses you expect on the campaign.
- An Anticipated ROI will be displayed.
- For a Revenue Generating Campaign
- Under Goal: Estimate Jobs- Enter the number of Revenue Jobs you expect to generate and the expected revenue these jobs will generate.
- Under Goal: Expense- enter the total of the expenses you expect on the campaign.
- An Anticipated ROI will be displayed.
13. Click the Save button at the bottom of the form to save the campaign.
Copying a Campaign
The Campaign Management Tool allows you to copy an existing campaign using the Save As option. This is especially helpful if you are running a similar campaign or repeating a campaign in a different timeframe.
To Copy a Campaign
1. From the Select A Campaign screen, open the campaign you want to copy and click the Save As at the bottom of the screen
You will be presented with a SAVE AS form.
2. Give a name to the campaign and identify the start date and end date for the campaign.
3. Click Save when you are done.
You will be taken to the CAMPAIGN FORM. Here you can make any necessary modifications to the campaign such as modifying the lead source list, expense items and campaign goals.
4. Once you’ve finished making any modifications click Save.
Running a Campaign
In order for a campaign to be accurately tracked you must properly be recording Lead Source information when creating jobs and including your defined Campaign expense items on posted AP Invoices.
Recording Campaign Expense
Campaign expense is calculated based upon the total of campaign related line items you have included on posted AP Invoices during the expense date range of the campaign.
Only items in the Overhead and Miscellaneous sections of the PriceBook can be counted as campaign expense.
The expense line items can begin on a Purchase Order, but will not be counted as actual expense until they appear on a posted AP Invoice.
When you add an item to a PO or AP Invoice that is part of a campaign, you will be able to tab to the Campaign field and selected the name of the campaign. The name of the campaign will appear as part of the line item.
If you add an item that is part of an active campaign and save the line without assigning a campaign, you will receive a message indicating the item is part of an open campaign and offering you the option to link it to the campaign.
- If you click No, the line will be saved with no campaign association.
- If you click Yes, you will be returned to the line item. Click the three dots in the Campaign field.
- You will receive a list of all open campaigns that reference the expense item. Select the campaign this expense is related to and click OK.
Creating Jobs that Resulted from a Campaign
A job is considered to be a result of a campaign when it is:
- Created in the date range of the campaign. This does not mean scheduled in the campaign date range, but actually created in Successware during the date range of the campaign.
- The job references one of the lead sources that has been associated with the campaign.
Identifying the Lead Source
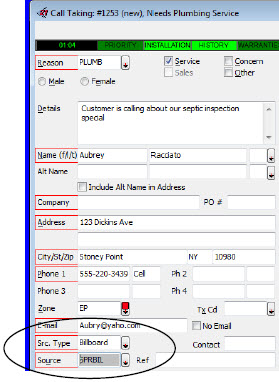
In order for a job to be recognized as part of a campaign you must record a Lead Source on the job that is part of an existing campaign.
The Lead Source and Lead Source Type fields are available when you create a job from CALL TAKING as well as directly from the JOB FORM.
Call Taking Form
Job Form
Job Results Reported to a Campaign
Each type of campaign will report the results directly related to the campaign as well as “other benefits” that resulted from the campaign.
Once a job is created that is a result of a campaign, the information from the job that is reported to the campaign as follows:
Revenue Job Campaigns
Reported Campaign Jobs and Revenue
- Job must be Closed (all appointments Completed)
- Reported revenue for Revenue Job Campaigns comes from total of all Posted Invoices for Job.
Revenue Job Campaign “Other Benefits”
- Sales/Estimate jobs created in date range of campaign with a Lead Source that is part of the campaign
- Must complete Sales Summary
- Mark Sold/Not Sold and if sold, Sold Amount
- Number of jobs and the total of the Sold Amount from those jobs will appear in OTHER BENEFITS area. Clicking Details will show you all of the jobs and whether the job sold or did not sell.
Estimate Job Campaigns
For Campaigns that are intended to create Estimate Jobs, the Actual values used in the campaign are gathered from the Sales Summary form associated with the Sales Job.
The Sales Summary is accessed by right clicking in the background of the JOB FORM itself or from an associated quote and selecting Job Summary.
For the actual values to attributed to the campaign you must, in the Sales Summary, mark that the JOB SOLD and the SOLD AMOUNT. If the job did not sell, you will close the sales job without marking that field.
Estimate Job Campaign “Other Benefits”
The Other Benefits area of an Estimate Job Campaign will display the count and revenue from Non-Sales Jobs created in the date range of campaign with a lead source that is part of the campaign. To appear in the results:
- The Job must be Closed (all appointments Completed)
- All Invoices for the Job must be posted
The OTHER BENEFITS area will show the count of jobs created as well as the total of all of their posted invoices.
Closing a Campaign
Once a campaign is complete and you will no longer be recording new sales or expenses against it, you can mark the campaign as closed. This remove the campaign from the active campaign list and will no longer be listed when relating expense items to a campaign on an AP Invoice.
To mark the campaign as closed, open the campaign from the Campaign list and then select Edit. Mark the campaign as Closed and then click Save.
Viewing Campaign Reports
Reporting on a Single Campaign
To see the results of a campaign, open the list of campaigns by going to the MAIN MENU -> Marketing and select Campaign Manager.
In the list of campaigns, double click the one you wish to view.
The CAMPAIGN FORM will display up-to-date information related to the campaign such as Total Revenue, Number of Jobs created, Expense, Current ROI and Other Benefits.
The CAMPAIGN FORM also allows you to view the detail of revenue generated and the related jobs, expenses and their related AP Invoice detail as well as an overall report of the campaign itself. To access this information, click the Detail button after the data you want to examine.
Each of these elements of detail can be reported or exported in an Excel format.
The Campaign Report
At the bottom of the CAMPAIGN FORM, the Report button will allow you to see a complete campaign report.
Note: The blue underlined text items in the report can be clicked to display a sub-report with the detail which makes up that report value.
Reporting on all Campaigns
To report on campaigns based on the type of campaign or the date range of a campaign you will use the Campaigns Report in the REPORT GALLERY.
The report can be found under the MARKETING GROUP in the REPORT GALLERY.
1. In the report, identify a date range. Any campaigns that were active in that date range will appear in the report.
2. Select the Type of Campaign you want to report on or select Both
3. If you want to limit the report to a single campaign, select it from the Campaign dropdown.
4. Use the OPEN CAMPAIGNS ONLY checkbox to include only campaigns in the report that have not been marked as Closed.
5. Click Print to run the report.
Note: The blue underlined text items in the report can be clicked to display a sub-report with the detail which makes up that report value.